Scenario:
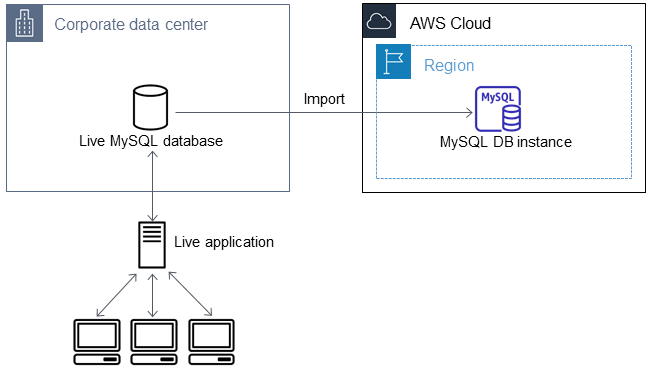
Client is having a on-premise corporate website. They are going to migrate to AWS cloud with HA Architecture. However, client wants the on-premise to be as a DR setup so that they can switch between AWS and On-premise as per their requirement in future.
Architecture:
I will be skipping the default architecture details. In this blog I will be discussing only about the AWS RDS Master to On-premise MySQL server as Slave.
Process:
Setup a Multi-AZ MySQL RDS in the AWS cloud with a backup retention of minimum 1 days. Enabling Backup and retention is mandatory for this process/ setup. Once the RDS is up and running go the Action button and create a read replica on the database.
Name the read replica as per the convenience. Once the read replica is up and running. Go to a jump server/ box and login to the database with the host as master MySQL endpoint.
Once you have logged in, please run the following command and check
mysql> call mysql.rds_show_configuration;
mysql> call mysql.rds_set_configuration('binlog retention hours',24);
mysql> show variables like "expire_logs_days";
mysql> SHOW MASTER STATUS;
mysql> show binary logs;
Create a user for the replication. We should not use '%' in production, hence I will be using the respective VPC cidr.
mysql> create user 'replicator'@'172.31.0.0/255.255.0.0' identified by 'replicationpassword';
mysql> grant replication slave, replication client on . to'replicator'@'172.31.0.0/255.255.0.0';
we must know global privileges can not be granted to the individual database, instead, it should be on all databases. i.e. use of . instead of an author.*
so the statement should look like this
grant process on . to tech_user;
Below are some of the well know global privileges
FILE
PROCESS
REPLICATION CLIENT
REPLICATION SLAVE
SUPER
Once this steps are completed, we will connect to the read replica Endpoint and run the following command:
mysql> SHOW SLAVE STATUS;
Check the seconds_behind_master must be 0, which means there is no replica lag. Once this is confirmed, run the stop command
mysql> call mysql.rds_stop_replication;
mysql> SHOW SLAVE STATUS;
Note down the following parameters to use it in future
Exec_Master_Log_Pos: 157
Relay_Master_Log_File: mysql-bin-changelog.000058
Now take the DB dump of the MySQL database
$ mysqldump -h hostname -u username -p dbname > backup_file_name.sql
By these steps most of the work on the AWS cloud is completed. Now we will connect to the on-premise MySQL database and create a similar database as in the Master DB.
Restore the DB dump to the On-premise DB
mysql -u root -p test_db < backup_file_name.sql
Login to the On-premise server and edit the my.cnf file and the following details
server_id = Random_number
replicate-do-db=test
Restart the MySQL
$ systemctl restart mysqld
Switch to the mysql terminal in on-premise. Run the following command
mysql> CHANGE MASTER TO MASTER_HOST=’172.0.0.102', MASTER_USER=’replicator’, MASTER_PASSWORD=’replicator’, MASTER_LOG_FILE=’Relay_Master_Log_File’, MASTER_LOG_POS=Exec_Master_Log_Pos;
Please note there is no quotes for the MASTER_LOG_POS.
Run the below command to filter out the table created by the AWS on the RDS, which is not needed in the On-premise
mysql> CHANGE REPLICATION FILTER REPLICATE_WILD_IGNORE_TABLE = (‘mysql.rds\_%’)
After the above step, you can start the the slave
mysql> start slave;
Check the slave status
mysql> show slave status \G
Confirm the seconds_behind_master must be 0
If no errors reported, the following section should show
Slave_IO_Running: Yes
Slave_SQL_Running: Yes
Now the Master Slave replication from AWS RDS to On-premise MySQL is completed.
Comments
Post a Comment